 English
 Español
 Türk
TürkContent
- 1 What Interfacing Actually Does in a Garment
- 2 Types of Interfacing and How to Choose the Right One
- 3 How to Apply Fusible Interfacing Step by Step
- 4 How to Apply Sew-In Interfacing
- 5 Interfacing vs. Interlining: Understanding the Difference
- 6 Where to Use Interfacing in Common Garment Pieces
- 7 Interfacing Weight: Matching Stiffness to Purpose
- 8 Troubleshooting Common Interfacing Problems
- 9 Interfacing for Non-Garment Sewing Projects
- 10 Testing Interfacing Before Committing to a Project
- 11 Recommended Interfacing Products Worth Knowing
What Interfacing Actually Does in a Garment
Interfacing is a supportive fabric layer sewn or fused between the outer fabric and lining to add structure, stability, and body to specific parts of a garment. If you have ever wondered why a shirt collar stands crisp, why a jacket lapel holds its shape after hundreds of wears, or why a waistband does not fold over on itself, the answer is almost always interfacing. It is applied to areas that take stress or need to maintain a defined shape — collars, cuffs, waistbands, button plackets, pockets, and necklines.
The bottom line: interfacing is not optional for structured garments. Skipping it or substituting the wrong weight will cause the finished piece to look home-sewn in the worst sense — floppy where it should be firm, stretched where it should be stable. Used correctly, it is the single most impactful technique separating amateur results from professional-looking ones.
This guide walks through every practical aspect of how to use interfacing in sewing: which type to choose, how to apply it properly, how to troubleshoot problems, and when interlining serves a different purpose entirely.
Types of Interfacing and How to Choose the Right One
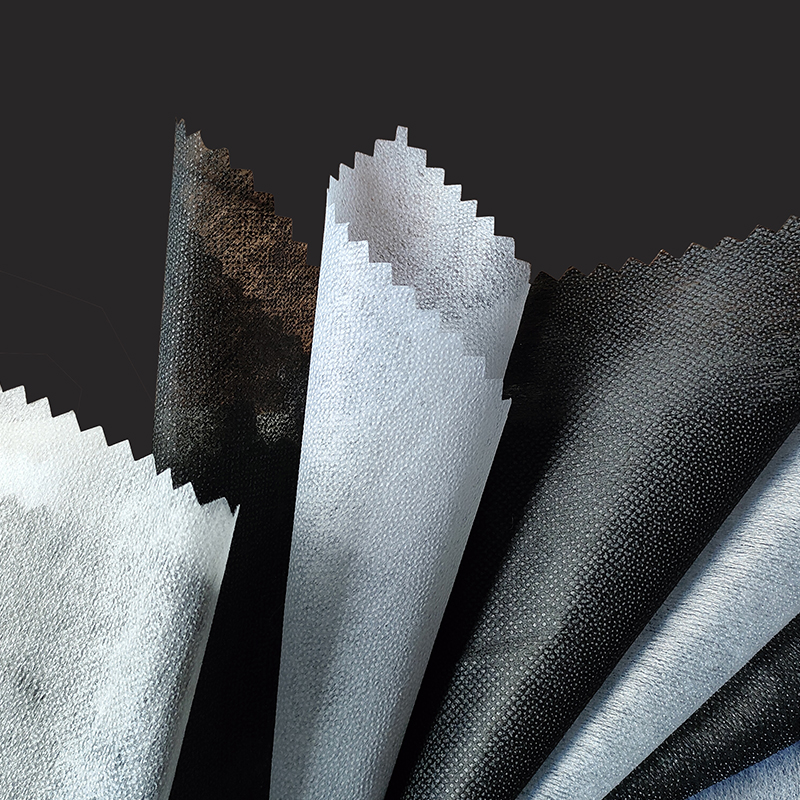
Interfacing comes in two major application methods — fusible and sew-in — and within each category, it varies by weight, fiber content, and weave structure. Picking the wrong one is one of the most common mistakes sewers make.
Fusible Interfacing
Fusible interfacing has a heat-activated adhesive coating on one side. When pressed with a hot iron and steam, the glue bonds to the fabric. It is by far the most popular choice for home sewers because of its speed and ease. However, the adhesive adds a slight stiffness beyond what the interfacing base fabric would provide alone. On fine or sheer fabrics, this can create a detectable change in drape and hand.
Fusible interfacing works exceptionally well on: woven quilting cottons, medium-weight denim, canvas, most synthetic blends, and stable knits. It struggles on fabrics with surface texture (boucle, velvet, heavily textured wool) because the adhesive cannot make full contact with the fibers, leading to partial bonding and eventual peeling.
Sew-In Interfacing
Sew-in interfacing is stitched into the seams rather than fused. It adds structure without altering the fabric's surface or drape as dramatically as fusible types. Tailors working with high-end wool, silk, or heat-sensitive synthetics almost exclusively use sew-in interfacing. It is also the only safe option for fabrics that cannot withstand high iron temperatures, such as sequined fabric, some metallics, and delicate sheers.
Hair canvas — a traditional sew-in interfacing made from horsehair or goat hair blended with cotton or linen — has been used in tailored jackets for over a century. It molds to the body over time and produces a soft yet structured result that no fusible product fully replicates.
Woven vs. Non-Woven vs. Knit Interfacing
Beyond application method, interfacing also differs in construction:
- Woven interfacing has grain lines like regular fabric. It should be cut on the same grain as the fashion fabric to avoid distortion. It gives a natural, flexible support and is ideal for structured woven garments.
- Non-woven interfacing has no grain and can be cut in any direction without fraying. It is economical and widely available, but can feel papery and does not always behave as naturally as woven types. Best for craft projects, bags, and non-critical garment applications.
- Knit interfacing has crosswise stretch, making it the correct choice for knit garments. Using woven interfacing on a stretchy jersey, for example, would eliminate the stretch entirely at the interfaced area — a functional disaster for a neckline or cuff.
| Fabric Type | Recommended Interfacing | Application Method |
|---|---|---|
| Cotton, linen, stable weaves | Woven or non-woven fusible | Iron-on |
| Knit, jersey, stretch fabric | Knit fusible interfacing | Iron-on |
| Wool suiting, tailored fabrics | Hair canvas or woven sew-in | Sew-in |
| Silk, chiffon, delicate sheers | Lightweight sew-in organza | Sew-in |
| Velvet, boucle, textured surface | Lightweight sew-in | Sew-in only |
| Denim, canvas, bag-making fabric | Medium to heavy non-woven fusible | Iron-on |
How to Apply Fusible Interfacing Step by Step
Applying fusible interfacing sounds straightforward — iron it on — but poor technique is responsible for most interfacing failures: bubbling, peeling, puckering, and uneven bonding. The following method produces reliable results across a wide range of fabric types.
Step 1: Pre-wash Both Fabrics
If your garment fabric is washable, pre-wash it before applying interfacing. Most interfacing, especially non-woven fusible, will shrink slightly in the wash. If you fuse it before washing, the interfacing and fashion fabric may shrink at different rates, causing the interfaced area to pucker and bubble permanently. Pre-washing eliminates up to 95% of shrinkage-related bubbling problems.
Step 2: Cut Interfacing to Size
Cut interfacing pieces to match the pattern piece they will support. Some sewers trim the interfacing slightly smaller — about 3mm inside the seam allowance — so that the adhesive does not contact the iron or pressing surface directly at the edges. This prevents glue residue from building up on your iron. Others cut it precisely to the pattern piece and use a pressing cloth as a barrier. Either approach works; choose the one you find easier to keep consistent.
When cutting woven interfacing, respect the grain line just as you would with fashion fabric. Non-woven interfacing can be cut in any direction, which is one of its few genuine advantages over woven types.
Step 3: Identify the Glue Side
Place the interfacing with the adhesive (rough or slightly bumpy) side face down against the wrong side of your fashion fabric. If you cannot tell which side has the adhesive, touch a corner lightly with your fingertip — the adhesive side feels slightly rougher or more textured. You can also hold it up to a light source; the glue dots are often faintly visible.
Placing the interfacing upside down is the most common beginner error and results in glue on your iron and no bonding whatsoever to the fabric.
Step 4: Use the Right Iron Temperature and Pressure
Most fusible interfacing requires a medium-to-high iron temperature with steam, held in place for 10 to 15 seconds per section. Do not slide the iron — press, lift, and move to the next section. Sliding can shift the interfacing before it bonds and stretch or distort the fabric. Overlap each press position slightly to avoid cold spots where bonding is incomplete.
Always check the manufacturer's instructions on the interfacing packaging. Some lightweight fusibles for synthetics require a lower temperature — as low as the synthetic setting — to avoid melting the fashion fabric. Ignoring this step and using too high a heat is the second most common cause of bubbling after skipping the pre-wash.
Step 5: Allow to Cool Completely Before Handling
After pressing, leave the fabric flat on the ironing board until it has cooled completely. The adhesive is still fluid when hot. Moving or bending the fabric while it is warm can cause partial delamination. Wait at least 60 seconds before testing the bond or continuing to sew. Once cool, try to peel a corner of the interfacing gently. A properly fused piece should not lift without effort.
Step 6: Press From Both Sides
Flip the fabric over and press from the right side using a damp press cloth. This final press drives any remaining adhesive into the fabric and smooths out any minor texture difference from the glue side. It also gives you a chance to check the right side of the fabric for any puckering or distortion before you continue constructing the garment.
How to Apply Sew-In Interfacing
Sew-in interfacing requires slightly more technique than fusible but gives you finer control over the result, especially in tailoring. The process differs depending on whether you are handling a woven or non-woven sew-in product.
For basic sew-in application, cut the interfacing to match the pattern piece. Place it against the wrong side of the fashion fabric piece, aligning grains if using woven interfacing. Hand-baste or pin the interfacing in place, then machine-stitch it within the seam allowance — typically about 3mm from the raw edge — all the way around the piece. When the garment seams are sewn, the interfacing becomes permanently caught in the seam structure without needing any adhesive at all.
For structured tailoring using hair canvas, the process is more involved. The canvas is catch-stitched to the fabric by hand using a technique where the stitches intentionally do not pass all the way through to the right side. This creates a flexible, almost padded quality that fusible interfacing simply cannot achieve. A hand-tailored jacket lapel that has been properly padded with hair canvas and catch-stitching will roll and drape in a way that machine-made fusible counterparts cannot match.
Interfacing vs. Interlining: Understanding the Difference
These two terms are frequently confused, even among experienced sewers. They describe different layers within a garment, applied for different purposes. Getting this distinction straight will help you make better fabric and construction choices for any project.
What Interfacing Is For
As established above, interfacing is applied to specific sections of a garment — collars, cuffs, waistbands, plackets — to provide localized structure and stability. It is not meant to cover the entire garment body. It is a targeted reinforcement layer.
What Interlining Is For
Interlining is a separate fabric layer sandwiched between the outer fabric and the lining across the entire garment body, used primarily for warmth, weight, or to alter the overall drape of the outer fabric. A wool winter coat lined with a thick flannel interlining is a classic example. The interlining adds insulation without changing the exterior appearance of the coat.
Common interlining materials include:
- Domette or bump: a soft, fluffy fabric used in drapery and formal wear to add weight and warmth
- Wool flannel: used as interlining in coats and jackets to increase warmth significantly
- Silk organza: used as a lightweight interlining in couture garments to help structured outer fabrics maintain their silhouette without adding visible bulk
- Thermal batting: used in quilted outerwear and winter garments specifically for heat retention
- Cotton lawn: occasionally used as a lightweight interlining to give body to sheer fabrics without opacity changes
The relationship between interfacing and interlining can be summarized clearly: interfacing gives structure to specific areas; interlining modifies the character of the whole garment. A well-constructed winter coat might use both — hair canvas interfacing in the collar and lapels for shape, and a wool flannel interlining throughout the body panels for warmth. They solve different problems and are not interchangeable.
In the context of drapery and curtain-making, interlining is extremely common and the term is used more frequently than in garment sewing. Luxury curtains often incorporate a thick bump interlining between the face fabric and the lining, which gives the curtains a heavier, more opulent appearance and also provides insulation for the window.
How to Attach Interlining
Interlining is typically loose-lining attached to the wrong side of the outer fabric before the lining is applied. It can be hand-basted in place across the fabric body, then treated as one layer with the outer fabric during garment construction. In some applications, particularly with lighter interlining fabrics like organza, the two layers are simply machine-stitched together within the seam allowances and handled as a single piece throughout construction. This technique is sometimes called "underlining," which adds another layer of vocabulary confusion to the topic.
Where to Use Interfacing in Common Garment Pieces
Pattern instructions will usually tell you which pieces to interface, but understanding the reasoning helps you make informed adjustments for different fabric weights or design changes.
Shirt and Blouse Collars
Both the under-collar and upper-collar pieces of a shirt collar are typically interfaced. For a crisp dress shirt collar, a medium-weight woven fusible gives excellent results. For a soft-roll collar on a blouse, a lightweight fusible or sew-in is more appropriate so the collar can fold and roll naturally without feeling stiff.
Cuffs
Shirt and blouse cuffs are nearly always interfaced on one layer — typically the outer cuff piece. The interfacing prevents the cuff from stretching out of shape when buttons are fastened and gives it the rigidity necessary to hold its folded position throughout the day.
Waistbands
A waistband without interfacing will fold, roll, and distort from wear within minutes. Every waistband on a structured garment — skirt, trousers, shorts — requires interfacing. For most garments, a medium-weight fusible applied to the full length and width of the waistband piece works well. Some sewers prefer to use a specialist waistband interfacing product with one straight and one perforated edge to help fold the waistband cleanly.
Button Plackets and Buttonhole Areas
The area where buttons and buttonholes are placed takes significant stress every time the garment is fastened. Interfacing stabilizes this zone, prevents the fabric from tearing around buttonholes over time, and gives buttons something firm to anchor into. On a cotton shirt, this is typically a strip of fusible interfacing on the wrong side of the placket. On a heavier jacket, the full front facing piece is interfaced.
Jacket and Coat Facings
The front facing of a jacket or coat — the piece that creates the finished edge at the center front — is almost always fully interfaced. On structured jackets, this facing works in conjunction with the chest canvas (a form of sew-in interfacing) to give the front of the jacket its characteristic flat, smooth appearance. Lightweight jackets and unlined blazers may use a medium fusible woven interfacing on the facing alone.
Pockets and Pocket Openings
Welt pockets, bound pockets, and pocket openings in woven garments benefit from a small rectangle of interfacing behind the opening area. This prevents the fabric from stretching or tearing as items are repeatedly placed in and removed from the pocket. The interfacing piece is typically cut slightly larger than the pocket opening itself so the reinforcement extends slightly into the surrounding fabric.
Necklines on Unlined Garments
On an unlined dress or top with a facing at the neckline, the facing piece is typically interfaced to prevent the neckline from stretching and losing its shape through wear and washing. For a very lightweight fabric, even a thin fusible knit interfacing on the facing can make a substantial difference to how well the neckline holds its shape over time.
Interfacing Weight: Matching Stiffness to Purpose
Interfacing weight is one of the most consequential choices you will make, and yet it receives far less attention in beginner tutorials than it deserves. Using interfacing that is too heavy for the fabric will make the supported area feel stiff, board-like, and harsh against the skin. Using interfacing that is too light will fail to provide any meaningful support.
The general principle is that the interfacing should be the same weight as or lighter than the fashion fabric. If your fabric is a lightweight cotton lawn, you should reach for a very lightweight fusible or a sew-in organza. If your fabric is a medium-weight denim, a medium-weight non-woven fusible is appropriate.
A reliable test: after fusing a test sample, hold it up and drape it over your hand. The way it behaves should be consistent with how you want the finished area to behave. A collar piece should still flex naturally; a waistband piece can be quite firm. If the test sample is so stiff it does not drape at all, go down a weight. If it behaves identically to the uninterfaced fabric with no added body, go up a weight.
| Garment Area | Lightweight Fabric | Medium Fabric | Heavy Fabric |
|---|---|---|---|
| Collar | Ultra-light sew-in organza | Light to medium woven fusible | Medium woven fusible or sew-in |
| Waistband | Light woven fusible | Medium non-woven or woven fusible | Heavy non-woven fusible |
| Jacket facing | Light woven sew-in or fusible | Medium woven fusible | Hair canvas (sew-in) |
| Buttonhole area | Lightweight non-woven fusible | Light to medium woven fusible | Medium non-woven fusible |
Troubleshooting Common Interfacing Problems
Even with good materials and careful technique, problems can appear. Here is how to diagnose and address the most frequent issues.
Bubbling After Washing
If the interfacing delaminates and bubbles after the first wash, the cause is almost always one of three things: the interfacing and fabric were not both pre-washed before fusing; the iron temperature was too low and the bond was never complete; or the fabric type was incompatible with fusible interfacing (textured surfaces prevent full contact). Once bubbling has occurred, the interfacing usually cannot be re-fused successfully. The best solution at that point is to remove it carefully — using a hot damp cloth to reactivate the adhesive — and replace it with sew-in interfacing instead.
Puckering or Distortion on the Right Side
If pressing the interfacing on has caused the fabric to pucker or wrinkle on the right side, the iron temperature was too high, or pressure was applied unevenly. In some cases, the fashion fabric itself is stretchy and was distorted by the pressing action. To avoid this with stretchy fabrics: always lay both layers flat without stretching before pressing, and use a firm pressing surface. Always use steam sparingly on knit fabrics, as moisture and heat together can cause excessive stretch.
Glue Residue on the Iron
This happens when the adhesive side faces up and contacts the iron, or when the interfacing extends beyond the fabric edge and the adhesive sticks to the ironing board cover. Always use a pressing cloth over the interfacing, keep the interfacing slightly inside the fabric edges, and check your iron sole plate regularly. An iron cleaning stick — available at most fabric stores for under €5 — removes adhesive residue quickly when the iron is hot.
Interfacing Showing Through Light-Colored Fabric
White or pale fabrics sometimes show the shadow of darker interfacing underneath, especially if the interfacing is a medium grey or black. Always choose white or off-white interfacing for pale fabrics. For sheer fabrics where interfacing would be visible regardless of color, opt for silk organza as the sew-in interfacing — it provides structure without being opaque.
Interfacing Too Stiff for the Finished Garment
If the interfaced area feels significantly stiffer than the surrounding fabric in a way that reads as unnatural or uncomfortable, the interfacing is too heavy. Unfortunately, this problem is difficult to fix after the fact. For future projects, always make a test sample with your chosen interfacing and fashion fabric before cutting into the full project, and hold the test sample against your body to evaluate how the stiffness level feels and looks.
Interfacing for Non-Garment Sewing Projects
Interfacing is not limited to clothing. It plays an equally important role in bags, accessories, home textiles, and craft projects — and the principles of selection and application are identical.
Bags and Totes
Fabric bags and totes made from lightweight cotton prints require interfacing or stabilizer to hold their shape under the weight of contents. For a simple tote bag, a medium-weight fusible woven applied to both the exterior front and back panels before sewing gives excellent shape retention. For structured bags — handbags with defined sides and bases — a heavy sew-in stabilizer like Decovil or Vilene S520 is commonly used. These products are significantly stiffer than garment interfacing and designed specifically for bag-making to support the weight of the bag's contents.
Quilting and Embroidery
In embroidery, particularly machine embroidery, a stabilizer — which is technically a form of interfacing — is placed behind the fabric during stitching to prevent distortion from the needle and thread movement. Cut-away, tear-away, and wash-away stabilizers serve different purposes depending on the fabric and design. In quilting, interfacing is occasionally used to stabilize bias-cut pieces or to prevent stretch in loose-weave fabrics before piecing.
Home Décor: Where Interlining Takes Center Stage
In home décor sewing — specifically curtain and drapery making — interlining is the dominant stabilizing layer rather than garment-style interfacing. Curtain interlining (bump or domette) is applied to the full body of the curtain panel to add weight, improve drape, and provide insulation. A pair of floor-length curtains with proper interlining can reduce heat loss through a window by as much as 25% compared to unlined curtains, making it a functional choice beyond aesthetics.
The interlining is typically hand-locked to the face fabric at regular intervals — a technique called interlining lock-stitch or interlining slip-stitch — before the lining is attached to the back. This prevents the interlining from shifting inside the curtain over time. For very large curtain panels, the interlining is also stitched to the top and side edges to keep it stable during hanging.
Testing Interfacing Before Committing to a Project
This step is consistently skipped by intermediate sewers in a hurry and consistently regretted. Before applying interfacing to your actual garment pieces — especially if you are using an unfamiliar interfacing product or an unfamiliar fashion fabric — always run a test on a scrap of the actual fabric you will be using.
Cut a swatch of the fashion fabric approximately 15cm x 15cm. Apply the interfacing using the same iron temperature and technique you plan to use on the full pieces. Then evaluate:
- Does the bond feel complete and secure, or does the interfacing lift at the corners?
- Is the right side of the fabric changed in texture, color, or drape in an undesirable way?
- Is the stiffness level appropriate for the intended use?
- If the garment will be washed, wash the test swatch and check for bubbling after drying.
Five minutes of testing eliminates the most expensive and frustrating interfacing mistakes. Fabric ruined by incorrect interfacing application — particularly bubbling on fashion fabric that cannot be easily replaced — is one of the most discouraging outcomes in garment sewing. The test swatch is cheap insurance.

Recommended Interfacing Products Worth Knowing
The interfacing market has a handful of products that sewers return to repeatedly because they perform reliably across a wide range of fabrics and applications. While brand availability varies by country, these names appear globally and are worth seeking out.
- Vilene / Pellon 805 (Wonder-Under): widely available fusible web used for appliqué and light bonding. Not a structural interfacing but useful for very lightweight applications.
- Pellon 931TD (Shirt-Tailor): a woven fusible interfacing specifically designed for dress shirts, with excellent stability and a natural hand. Very well regarded for collar and cuff applications.
- Vilene G700: a medium-weight woven fusible commonly used in European tailoring. Bonds reliably to most woven fashion fabrics and is a standard choice for facings and collars.
- Pellon Knit-Shape: a knit fusible interfacing designed for stretch fabrics. Maintains crosswise stretch while adding some stability, making it appropriate for knit waistbands and neckline facings.
- Hair canvas (various brands): the traditional tailoring sew-in. Available from specialty tailoring suppliers. Properly used, it is the benchmark against which all other interfacing options are measured for high-end structured jackets.
When purchasing interfacing, buy a small amount — 30 to 50cm — of any new product before committing to a full project's worth. Interfacing properties vary between manufacturers and even between product lines from the same brand, and the only reliable way to know how a particular product behaves with your fabric is to test it yourself.


