English
 Español
 Türk
TürkContent
- 1 The Short Answer: What You Need to Know Before Sewing Denim
- 2 Understanding Denim: Weight, Weave, and What That Means for Sewing
- 3 Tools and Machine Setup for Sewing Denim
- 4 Interlining for Denim: Where It's Used and Why It Matters
- 5 Cutting Denim Accurately
- 6 Sewing Denim Seams: Techniques That Hold Up
- 7 Constructing a Denim Waistband with Interlining
- 8 Installing a Fly-Front Zipper in Denim
- 9 Topstitching Denim: Getting Clean, Even Lines
- 10 Hemming Denim: Original Hem Preservation and Standard Hemming
- 11 Pressing Denim: The Step Most Sewers Rush
- 12 Common Denim Sewing Problems and How to Fix Them
- 13 Denim Projects Beyond Jeans: Jackets, Bags, and Skirts
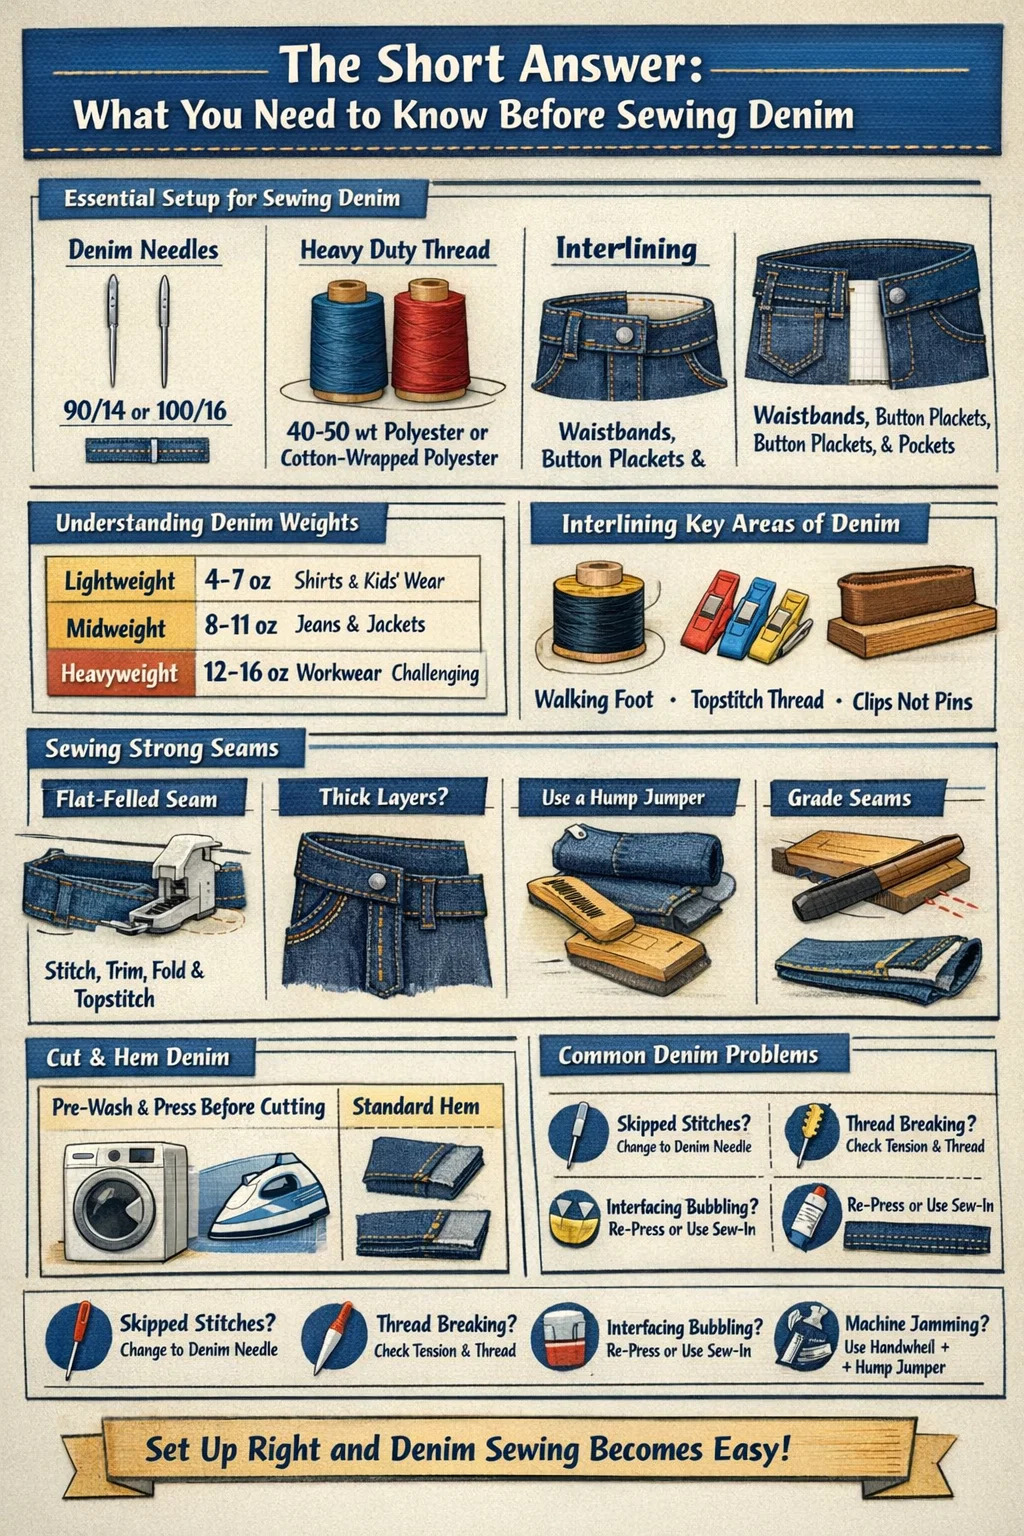
The Short Answer: What You Need to Know Before Sewing Denim
Sewing denim is absolutely doable at home, even on a standard sewing machine—but only if you set yourself up with the right tools and materials from the start. The most common mistakes are using the wrong needle, ignoring thread weight, and skipping interlining where the fabric needs structural support. Get those three things right, and denim goes from frustrating to manageable.
Use a denim needle (size 90/14 or 100/16), heavy-duty polyester or cotton-wrapped polyester thread, and add interlining to waistbands, button plackets, and pocket openings. These aren't optional upgrades—they're the baseline for denim that holds together wash after wash.
This guide walks through every stage: fabric selection, machine setup, cutting, stitching, finishing, and where interlining and interfacing fit into the whole process. Whether you're making jeans from scratch, hemming a pair of existing ones, or constructing a denim jacket, the principles here apply.
Understanding Denim: Weight, Weave, and What That Means for Sewing
Denim is a twill-woven cotton fabric, typically identified by its diagonal rib pattern on the surface. The warp threads (running lengthwise) are dyed—usually indigo—while the weft threads remain undyed, which is why the inside of raw denim appears lighter. That structure matters when you're cutting and sewing, because denim has very little give on the straight grain but moderate stretch on the bias.
Denim is measured in ounces per square yard. Here's a practical breakdown:
| Weight | Oz per sq yard | Best For | Machine Difficulty |
|---|---|---|---|
| Lightweight | 4–7 oz | Shirts, light skirts, children's wear | Easy |
| Midweight | 8–11 oz | Jeans, jackets, bags | Moderate |
| Heavyweight | 12–16 oz | Workwear, structured bags, outerwear | Challenging |
For most home sewing projects—especially first-time jeans—8 to 10 oz denim hits the sweet spot. It's firm enough to hold structure without overpowering a domestic sewing machine. Anything above 12 oz will require a heavy-duty or industrial machine and specialized needles.
Stretch denim (denim with 1–3% elastane) behaves differently. The stretch makes fitting easier, but the fabric can shift during stitching. Use a walking foot and reduce presser foot pressure slightly to prevent the layers from sliding apart.
Tools and Machine Setup for Sewing Denim
Skipping the setup phase is the single biggest reason denim projects go wrong. Here's exactly what your machine and toolkit need before the first stitch.
Needles
Standard universal needles bend or break against denim's tight weave. Use dedicated denim needles, which have a sharp, reinforced tip designed to pierce tightly woven fabric cleanly. Size 90/14 works for most 8–10 oz fabric. Go up to 100/16 or even 110/18 for heavier weights or multiple layers. Change the needle every 6–8 hours of sewing time—denim dulls needles faster than almost any other fabric.
Thread
Thread choice affects both durability and appearance. For structural seams, use 100% polyester or cotton-wrapped polyester thread in a weight of 40 or 50. This gives enough strength for stress points without snapping. For topstitching—the visible stitching along seams, pockets, and waistbands—use topstitch thread (usually labeled as 30-weight or heavy-duty). Classic jeans use yellow or gold topstitch thread as a contrast, but matching thread looks cleaner on non-denim-style garments.
Presser Feet
- Standard foot: Fine for single or double layers
- Walking foot (dual-feed foot): Essential when sewing multiple layers or stretch denim—it feeds both top and bottom layers at the same rate, preventing shifting
- Jeans foot (roller foot): Reduces drag on thick seams
- Zipper foot: Required for fly-front zippers
Stitch Length and Tension
Set your stitch length to 3.0–3.5mm for structural seams and 3.5–4.0mm for topstitching. Longer stitches look more professional on visible seams and are easier to unpick if you need to make adjustments. Tension typically needs to be slightly higher than your machine's default—do a test on a scrap piece and check that neither the top nor bottom thread loops on the surface.
Additional Tools
- Clips (not pins): Fabric clips hold denim layers without distorting the fabric or leaving holes
- Seam roller or wooden clapper: Used after pressing to flatten thick seams without over-pressing
- Leather thimble or finger guard: Useful when hand-sewing bartacks or securing waistbands
- Rotary cutter and cutting mat: Cleaner cuts than scissors on stiff, heavy fabric
- Heavy-duty iron: A standard household iron works, but a steam iron with a clapper gives much flatter, crisper results on thick seams
Interlining for Denim: Where It's Used and Why It Matters
The terms interlining and interfacing are often used interchangeably in home sewing, but they refer to different things. Interfacing is fused or sewn directly to the wrong side of a fabric piece to add stiffness or stability. Interlining is an additional layer placed between the outer fabric and lining, primarily for warmth or body—without necessarily being attached. In denim sewing, both have distinct roles.
For most denim garment construction, when sewers say "interlining," they're referring to woven or non-woven interfacing applied to specific pattern pieces to prevent stretching, add structure, or reinforce stress points. The distinction matters because using the wrong type—or skipping it entirely—leads to waistbands that roll, button plackets that gap, and pocket edges that fray and distort after washing.
Where to Apply Interlining on Denim Projects
- Waistband: The most critical area. Without interlining, a denim waistband stretches during wear and loses its shape after a few washes. Use a firm, woven fusible interfacing or a specialized waistband interlining product cut to the exact waistband piece size.
- Button and buttonhole plackets: These areas absorb stress every time the garment is fastened. A medium-weight sew-in or fusible interlining prevents the placket from distorting and makes buttonholes cleaner and more durable.
- Pocket openings and pocket bags: The top edge of a pocket opening is a high-stress zone. Applying a narrow strip of interlining along the pocket opening prevents stretching and keeps the edge clean.
- Collar and cuffs (denim jackets or shirts): Structured collars need a firm interlining to stand properly. The same applies to jacket cuffs that need to lie flat and hold their shape.
- Fly shield and fly facing: The fly zone of a pair of jeans benefits from a sew-in interlining layer that prevents twisting and keeps the zipper installation flat and secure over time.
Types of Interlining Compatible with Denim
Choosing the right interlining for denim depends on the weight of your denim and the function of the piece you're stabilizing.
- Woven fusible interfacing (medium to heavy weight): Best for waistbands and structured areas. The woven construction means it moves with the fabric rather than against it, and the fusible backing bonds under heat and steam without adding excessive bulk.
- Non-woven fusible interfacing: Works well for lighter denim or for areas that don't require much flex. Avoid very stiff non-woven interfacing on denim heavier than 10 oz—it can create an uncomfortably rigid result.
- Sew-in interfacing: Preferred for areas that will be laundered frequently or for natural-fiber denim where heat bonding can be unreliable. Sew-in interlining is also better for beginners who haven't yet mastered the fusing technique without bubbling.
- Waistband-specific interlining (Petersham or Ban-Rol): These are stiff ribbon-like products designed specifically for waistbands. They prevent the waistband from rolling or folding over without adding the bulk of a full interfacing layer.
- Insulating interlining (Thinsulate or fleece): For denim jackets or outerwear, an insulating interlining layer placed between the denim shell and lining adds warmth without the bulk of traditional batting. This is where the term "interlining" most closely matches its technical definition.
How to Apply Fusible Interlining to Denim
- Cut the interlining to match the pattern piece exactly—trim away any seam allowances if the interlining should not extend into the seam.
- Pre-wash your denim before fusing. Fusing to unwashed denim means the interlining may pucker or bubble the first time the garment is laundered.
- Place the interlining glue-side down on the wrong side of the denim piece.
- Cover with a damp pressing cloth to protect both the denim and the interlining.
- Press (don't slide) a hot iron in 10–15 second holds across the entire surface. Apply firm pressure. Sliding the iron can shift the interlining before it bonds.
- Allow the piece to cool completely on the ironing board before moving it. Handling a warm fused piece can cause the bond to release at the edges.
- Check the bond by gently tugging a corner. If it lifts, re-press with more heat and pressure.
Bubbling after washing is almost always caused by insufficient heat, not enough pressure, or skipping the pre-wash step. If your interlining bubbles consistently, switch to a sew-in version rather than fusible.
Cutting Denim Accurately
Accurate cutting is non-negotiable with denim. Unlike soft wovens that forgive slight misalignment, denim's stiff structure means any deviation in the cut shows up as a crooked seam or a skewed pattern piece.
Pre-Washing the Fabric
Denim shrinks—typically 3–8% after the first wash, depending on the fabric weight and fiber content. Always pre-wash your denim in the same water temperature you plan to use for laundering the finished garment. Dry it in the dryer as well if that's your normal practice. Skipping this step means a finished garment that no longer fits after its first wash.
After washing and drying, press the fabric flat with a hot steam iron before laying out your pattern. Denim tends to come out of the dryer with distorted selvages—press carefully to straighten the grain lines before cutting.
Laying Out Pattern Pieces
Always align pattern pieces with the grain line running parallel to the selvage. Denim cut off-grain will twist as you sew and even more after washing. For jeans, the center front and center back seams should lie perfectly on-grain; the side seams can have a slight angle to accommodate the pattern shaping.
For directional denim (fabric with a visible diagonal nap or pattern), treat it the same way you would a one-way fabric: cut all pieces in the same direction to avoid panels that look different shades under light.
Cutting Techniques
- A sharp rotary cutter (45mm or 60mm) on a self-healing cutting mat gives the cleanest edges on heavy denim
- Use a quilting ruler or long metal ruler as a straightedge for straight seams
- For curves (crotch seams, seat curves), fabric scissors with a sharp point work better than a rotary cutter
- Cut notches outward (away from the seam allowance) rather than inward on heavy denim—inward notches weaken the seam allowance on a fabric that already has limited give
- Use pattern weights instead of pins to hold pieces flat—pins can distort stiff fabric and leave visible holes
Sewing Denim Seams: Techniques That Hold Up
Denim seams experience significant stress—particularly at the crotch, inner thighs, and waistband attachment. The seam type, stitch, and finishing method you choose determine whether your garment lasts two seasons or twenty years.
Flat-Felled Seams
The flat-felled seam is the signature seam of denim clothing. It creates two visible rows of stitching on the right side of the fabric and completely encases both raw edges within the seam—no additional finishing needed. This is the strongest seam construction for high-stress areas like the inseam and outseam of jeans.
To sew a flat-felled seam:
- Sew the seam with right sides together, using a standard 5/8" seam allowance.
- Press both seam allowances to one side.
- Trim the bottom seam allowance to approximately 1/4".
- Fold the top (wider) seam allowance over the trimmed one, encasing it completely.
- Press flat and topstitch close to the folded edge, then add a second row of topstitching near the seam line.
The direction you fold—toward the back or toward the front—determines which side shows the double topstitching. On jeans, the outseam typically fells toward the back; the inseam fells toward the front.
French Seams on Lighter Denim
For lightweight denim (under 7 oz) used in shirts or skirts, French seams encase raw edges neatly and give a clean finish on the inside. They don't work well on heavier denim because the bulk becomes unmanageable, especially at curves.
Standard Seams with Serged or Zigzag Edges
For projects where you're not topstitching every seam (like a denim skirt with a lining or a structured bag), a standard 5/8" seam pressed open with serged or zigzag-finished edges is perfectly adequate. Press seams open on bags and structured projects to reduce bulk at corners and intersections.
Handling Thick Seam Intersections
The crotch seam intersection on jeans—where the front and back crotch curves meet the inseam and the waistband attaches—can stack up to 8–12 layers of denim. Standard domestic machines struggle here. Tricks that work:
- Clip the threads and manually advance the needle by turning the flywheel by hand through the thickest section
- Use a "hump jumper" or a small folded scrap of denim under the back of the presser foot to level the foot over the bump
- Reduce bulk by grading seam allowances at intersections (trimming each layer to a different width so they don't all stack at the same point)
- Press each seam before crossing it with the next one—a well-pressed seam is significantly thinner than an unpressed one
Constructing a Denim Waistband with Interlining
The waistband is the most structurally demanding part of sewing jeans or denim trousers. It needs to be rigid enough to stay upright throughout the day, but not so stiff that it digs in or cracks. Interlining is what makes the difference.
Cutting the Waistband
Cut the waistband piece on the straight grain (not the bias) so it resists stretching. Standard waistband width is 1.25–1.5 inches finished, though fashion jeans vary. The cut piece is typically twice the finished width plus seam allowances, though one-piece fold-over waistbands are common in home patterns.
Applying Interlining to the Waistband
Cut a strip of firm woven fusible interlining the same length as the waistband and half the finished width (it should cover only the outer half, not the inner facing). Fuse it to the wrong side of the waistband piece before assembling. If you're using a Petersham ribbon or Ban-Rol waistband interlining, catch it in the seams rather than fusing—it's stitched into position as you attach the waistband to the jeans.
A well-interlining-reinforced waistband will not roll down at the front or buckle at the sides after washing—two of the most common complaints with homemade jeans that skipped this step.
Attaching the Waistband
- Sew the waistband to the top of the jeans with right sides together, matching notches at the center front, side seams, and center back.
- Grade and clip the seam allowance, then press it up into the waistband.
- Fold the waistband in half, press, and pin the inner edge down to cover the seam allowance on the inside of the jeans.
- From the right side, stitch in the ditch (directly in the existing seam line) to catch the inner waistband edge—this gives a clean, invisible finish on the outside.
- Add a bar tack or belt loop stitching at regular intervals around the waistband to secure and reinforce it further.
Installing a Fly-Front Zipper in Denim
The fly front is one of the most technically complex parts of sewing jeans, but breaking it into stages makes it manageable. Use a metal zipper—nylon coil zippers don't hold up as well to the stress and weight of denim. A standard jeans zipper is 6–7 inches long.
Preparing the Fly Pieces
The fly shield (the piece that faces inside) should be interfaced or interlined with a medium-weight sew-in interfacing. This keeps the fly flat against the body, prevents the zipper from bulging, and gives the hand-stitched bartack at the bottom something solid to grip. Cut the fly facing and fly shield from the same denim, apply interlining, and serge or zigzag the curved edges.
Zipper Attachment Steps
- Stitch the crotch seam to the fly notch point. Reinforce with a second row of stitching in the curved section.
- On the right front (from the wearer's perspective), press the seam allowance back and baste the zipper tape in place, right side up, with the zipper stop just below the waistband seamline.
- Using a zipper foot, stitch close to the zipper coil through the fly facing only.
- Attach the fly shield to the left front, enclosing the other side of the zipper tape.
- Stitch the curved J-shaped topstitching line across the right front using the topstitch thread, securing all layers.
- Secure the bottom of the fly with a hand-sewn or machine bartack.
Topstitching Denim: Getting Clean, Even Lines
Topstitching is both functional and decorative on denim. It reinforces seams, secures pocket edges, and defines the garment's style. Messy topstitching is immediately visible and can undermine an otherwise well-constructed piece.
Tools for Consistent Topstitching
- Edge-stitching foot or topstitching foot with a center guide keeps lines parallel to the edge automatically
- Quilting bar guide attachment lets you set an exact distance from a previous row—essential for double-row topstitching
- Chalk or a water-soluble fabric pen can mark stitching lines if your machine's presser foot markings aren't visible through heavy fabric
Topstitching Distances
Standard jeans-style topstitching sits 1/4 inch from the seam line for the first row, with a second row 1/4 inch beyond that. On waistbands, topstitching is usually placed 1/4 inch from both the top and bottom edges. Pocket bags are typically topstitched 1/8 inch from the edge for a clean, secure finish.
Starting and Ending Topstitching Lines
Because topstitching thread is thick, backstitching creates an obvious lump. Instead, leave 4-inch thread tails at both ends, then thread them onto a large hand-sewing needle and knot them into the seam allowance on the inside of the garment. This gives a clean finish without bulk on the right side.
Hemming Denim: Original Hem Preservation and Standard Hemming
Hemming denim—particularly on jeans—is one of the most requested alterations for both home sewers and tailors. There are two main approaches: a standard hem (folded and topstitched) and the original hem preservation method.
Standard Hem
- Mark the new hemline all the way around the leg with chalk or pins, with the jeans on.
- Cut off the excess, leaving 1 inch of hem allowance.
- Serge or zigzag the raw edge, then fold up 1 inch and press firmly.
- Topstitch with matching or contrast thread 1/8–1/4 inch from the folded edge.
At the side seams and inseam, the hem will stack 4–6 layers. Use a jeans needle, go slowly, and use the hump jumper trick to keep the presser foot level.
Original Hem Preservation (The Chain Stitch Method)
This technique keeps the original factory hem—distressing, fading, and all—while shortening the jeans. It's popular for vintage or selvedge denim where the original hem is irreplaceable.
- Determine how much length needs to be removed. Call this amount X.
- Fold the leg up to the inside by X/2 (half the amount to be removed), just above the original hem.
- Stitch around the leg close to the original hem, through all layers.
- Fold the sewn tuck down so the original hem shows at the bottom.
- Press and topstitch if needed to keep the tuck flat inside.
The result is a slightly thicker hem zone but with the original hem intact. This method works best when removing 1–2 inches of length; for more than 2 inches, the internal bulk becomes visible and uncomfortable.
Pressing Denim: The Step Most Sewers Rush
Pressing is not optional in denim construction. Every seam should be pressed before it's crossed with another seam. Every folded edge should be pressed before topstitching. Every interlining application requires proper heat and steam. Without pressing, even technically accurate sewing looks unfinished and amateurish.
Use a steam iron at the cotton setting (around 200°C) directly on the wrong side of the denim. For seams on the right side, use a pressing cloth to prevent shining. A tailor's clapper—a solid block of wood pressed hard on a just-steamed seam—flattens thick seams far more effectively than iron pressure alone. The clapper traps the steam heat in the fabric and uses that to set the crease flat.
Curved seams (crotch seam, armhole of a denim jacket) should be pressed over a tailor's ham to maintain the curve shape. Pressing a curved seam flat on the ironing board distorts the shape and makes it lay awkwardly in the garment.
Common Denim Sewing Problems and How to Fix Them
Skipped Stitches
Almost always caused by a dull or wrong needle. Replace the needle with a fresh denim-specific needle. If skipping continues, check that the needle is fully seated in the clamp and that the thread is correctly threaded through the take-up lever.
Thread Breaking
Usually a tension issue or a thread weight mismatch. Check that the top tension isn't set too high. Make sure your thread is rated for the fabric weight—fine thread will snap on heavy denim under topstitch tension.
Seams That Pucker
Puckering typically results from too much tension or sewing too fast through thick sections. Slow down, reduce tension slightly, and use a walking foot to keep layers feeding evenly.
Interlining Bubbling After Washing
The fusible bond failed during washing. This happens when the fusing temperature was too low, the pressing time insufficient, or the denim wasn't pre-washed. Switch to a sew-in interlining for durability, or re-press the piece with a damp cloth, maximum heat, and firm static pressure for 15-second holds per section.
Machine Refusing to Move Through Thick Layers
Don't force the machine—you risk breaking the needle into the machine's mechanisms. Use the hump jumper, manually advance with the flywheel, and grade seam allowances at intersections before you reach them. If the problem is consistent rather than just at thick spots, your machine may not have the power for the denim weight you're using. Consider moving to a heavy-duty or semi-industrial machine for 12 oz and above.
Denim Projects Beyond Jeans: Jackets, Bags, and Skirts
Denim is one of the most versatile sewing fabrics. The techniques above apply across project types, with some adjustments.
Denim Jackets
Collar stands and cuffs need firm interlining to hold their structure. Use woven fusible interfacing on the collar stand piece and sew-in interfacing on the outer collar. If adding a lining, a lightweight polyester interlining between the denim and lining provides warmth without bulk. Flat-felled seams on the shoulders and side seams add authenticity and durability.
Denim Bags
Bags require structure that garments don't. Heavy-duty interfacing or interlining (foam stabilizer, thick woven interfacing, or fusible fleece) applied to every panel keeps bag walls from collapsing. Press seams open rather than to one side to reduce bulk at corners. Use metal rivets or bar tacks at stress points (strap attachments, handles). Bags don't need to flex for comfort the way clothing does, so heavier interlining is fine.
Denim Skirts
For a fitted denim skirt, use the same waistband interlining technique as jeans. A-line or full denim skirts in lighter weight fabric work well with French seams for a clean interior finish. If the skirt has a lining, interlining between the two layers adds body and prevents the outer denim from clinging.