 English
 Español
 Türk
TürkContent
- 1 The Short Answer: What You Need to Know First
- 2 Materials and Tools You Will Need
- 3 Taking Measurements Correctly
- 4 Cutting the Fabric Panels
- 5 Sewing the Skirt Body Together
- 6 Using Interlining in the Waistband: Why and How
- 7 Creating and Sewing the Waistband Casing
- 8 Threading and Securing the Elastic
- 9 Hemming the Skirt
- 10 Common Mistakes and How to Fix Them
- 11 Lining an Elastic Waist Skirt
- 12 Finishing Touches That Elevate the Final Result
- 13 Fabric and Interlining Combinations Worth Knowing
- 14 How Long Does It Take to Make an Elastic Waist Skirt?
The Short Answer: What You Need to Know First
Making a skirt with an elastic waist is one of the most beginner-friendly sewing projects you can take on — but doing it well requires more than just threading elastic through a casing. A truly well-made elastic waist skirt uses the right fabric, accurate measurements, a clean waistband casing, and in many cases, a layer of interlining to add body and prevent the waist from rolling or stretching out of shape. Whether you are sewing a simple A-line skirt, a gathered skirt, or a tiered maxi skirt, the core construction principles remain the same. This guide walks you through every step, from choosing materials to finishing the hem, with practical details that make a real difference in the final result.
Elastic waist skirts are popular for good reason. They require no zipper, no button placket, and very little fitting — making them fast to sew and comfortable to wear. But skipping key steps like stabilizing the waistband or choosing the wrong elastic width leads to a skirt that looks homemade in the wrong sense: puckered, saggy, or uncomfortable. Follow the process below and you will end up with a skirt that looks intentional and wears beautifully.
Materials and Tools You Will Need
Before cutting a single piece of fabric, gather everything you need. Running out of supplies mid-project is more disruptive than it sounds, especially when you are working with cut pieces that need to stay organized.
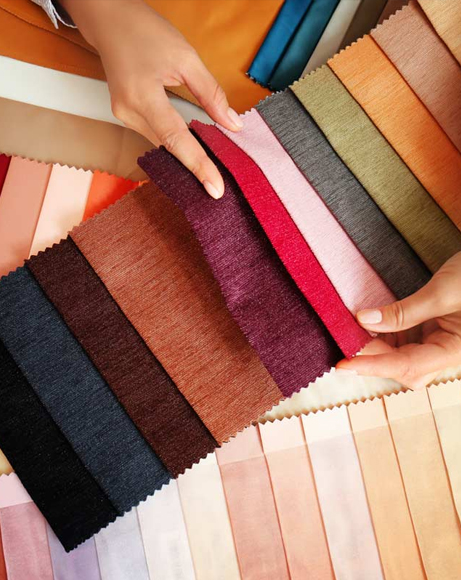
Fabric Selection
Your fabric choice directly affects how the skirt drapes, gathers, and holds its shape. Lightweight fabrics like cotton lawn, rayon challis, and chiffon create soft, flowing gathered skirts. Medium-weight fabrics like quilting cotton, linen, and ponte knit work well for A-line and structured styles. Heavier fabrics like denim, canvas, or thick wool are possible but require more planning around the waistband, since bulk at the elastic casing becomes a real issue.
For a gathered skirt, plan for 1.5 to 2.5 times your hip measurement in fabric width, depending on how full you want the skirt. A tiered skirt multiplies that further. An A-line skirt needs much less — just enough to allow comfortable movement through the hips.
Elastic
Choose elastic that matches your intended use. For a standard pull-on skirt, 1-inch (2.5 cm) wide braided or woven elastic is the most common choice. Braided elastic narrows when stretched, while woven elastic maintains its width — woven is generally better for waistbands because it stays flat against the body. Avoid knit elastic for this application unless you are working with stretch fabrics. You will need a length equal to your comfortable waist measurement plus about 1 inch (2.5 cm) for overlap when joining the ends.
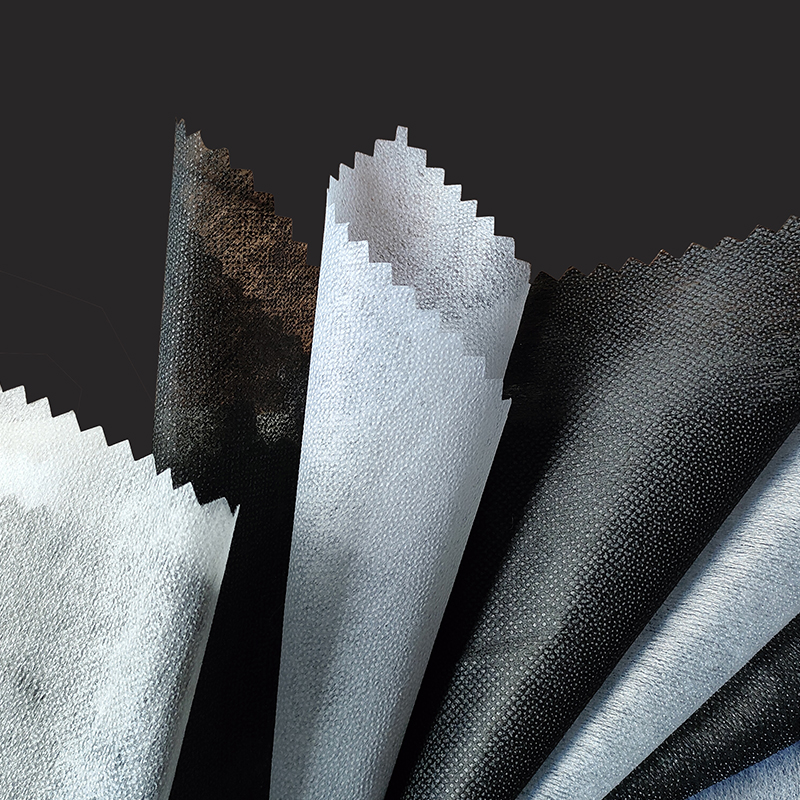
Interlining
Interlining is a layer of fabric placed between the outer fabric and the lining (or between the outer fabric and itself in an unlined skirt) to add structure, warmth, or opacity. In the context of an elastic waist skirt, interlining serves a specific and very practical purpose: it stabilizes the waistband casing so the elastic does not cause the fabric to bunch excessively, roll, or distort over time. A thin woven interlining, such as a soft cotton or polyester non-woven interlining cut to the width of the waistband casing, is often all you need. This is different from interfacing — interlining is a full separate layer rather than a fusible stabilizer, though in some applications the terms overlap depending on the manufacturer. If your outer fabric is particularly lightweight or slippery, using an interlining layer at the waist makes a meaningful difference in the finished look.
Other Tools and Supplies
- Sewing machine with standard presser foot
- Matching thread
- Rotary cutter or fabric scissors
- Cutting mat and quilting ruler (for straight cuts)
- Pins or wonder clips
- Safety pin or bodkin for threading elastic
- Iron and ironing board
- Seam ripper
- Measuring tape
- Fabric marker or tailor's chalk
Taking Measurements Correctly
Accurate measurements are the foundation of a well-fitting skirt. Because elastic waist skirts have built-in ease, you have some flexibility — but you still need to start with correct numbers.
| Measurement | Where to Measure | How It Is Used |
|---|---|---|
| Waist | Natural waist or preferred wearing position | Determines elastic length |
| Hips | Fullest part of hips, usually 7–9 inches below waist | Determines minimum fabric width for A-line styles |
| Skirt length | Waist to desired hem (mini, knee, midi, maxi) | Determines fabric cut length plus seam allowances |
| Waistband depth | Twice the elastic width plus 1 inch (2.5 cm) ease and seam allowance | Determines how wide to cut the waistband fold |
For elastic length specifically, measure your waist snugly, then subtract about 2 to 4 inches (5–10 cm) to get a comfortable pull-on fit that stays up without being tight. Test the elastic around your waist before cutting — it should feel secure but not constricting.
Cutting the Fabric Panels
Most simple elastic waist skirts consist of one or two fabric panels sewn together at the sides. Here is how to approach cutting for different skirt styles.
Gathered Skirt
Cut one or two rectangles of fabric. The width of each panel should be 1.5 to 2.5 times your hip measurement divided by the number of panels. The length should be your desired skirt length plus 1 inch (2.5 cm) for the hem and 0.5 inch (1.3 cm) for the seam allowance at the top — the waistband casing is added separately. If you are working with a single panel and folding the fabric in half on the fold, you only need one side seam.
A-Line Skirt
An A-line skirt requires a shaped cut that is narrower at the top and wider at the hem. You can draft a simple A-line pattern using your waist and hip measurements, or use a commercial pattern. The front and back panels are cut identically (or nearly so) and sewn at the side seams. Add 5/8 inch (1.5 cm) seam allowance on all sides except the waist top, which will be enclosed in the casing.
Tiered Skirt
A tiered skirt has two or more horizontal sections attached one below the other, with each tier wider than the one above. A common ratio is for each lower tier to be 1.5 to 2 times wider than the tier above it. Cut each tier as a rectangle and gather it to fit the bottom of the tier above. The top tier attaches to the waistband casing.
Pre-Washing Fabric
Always pre-wash and dry your fabric before cutting, using the same method you plan to use for laundering the finished skirt. Cotton fabrics can shrink by 3 to 5 percent in the first wash. Skipping this step can result in a skirt that is too short or too tight after the first laundering.
Sewing the Skirt Body Together
With your panels cut and pressed, it is time to assemble the skirt body before attaching the waistband.
Joining the Side Seams
Place the front and back panels right sides together, aligning the side edges. Pin or clip every few inches. Sew the side seams using a 5/8 inch (1.5 cm) seam allowance unless your pattern specifies otherwise. Backstitch at the beginning and end of each seam. Press the seams open or to one side — pressing open gives a flatter result, while pressing to one side is faster and slightly stronger.
Finish the raw edges of the seam allowances to prevent fraying. Options include serging (overlocking), zigzag stitching, or pinking shears. For a garment that will be washed frequently, serging is the most durable finish.
Gathering the Skirt Top (for Gathered Styles)
If you are making a gathered skirt, you will need to gather the top edge of the skirt body so it matches the width of the waistband casing. Sew two parallel rows of long basting stitches (stitch length 4.0–5.0 mm) at 3/8 inch and 5/8 inch from the top raw edge. Do not backstitch these gathering stitches — you need to pull them to create gathers. Pull the bobbin threads gently from both ends, distributing the gathers evenly across the top edge until the gathered width matches your waistband measurement. Secure the threads by wrapping them in a figure-eight around a pin at each end.
Using Interlining in the Waistband: Why and How
This is where many home sewers skip a step that professional dressmakers rarely overlook. Interlining in the waistband area gives your elastic skirt a noticeably more polished, structured look — and it extends the life of the waistband by reducing the stress placed directly on the outer fabric by the elastic.
What Interlining Does in This Context
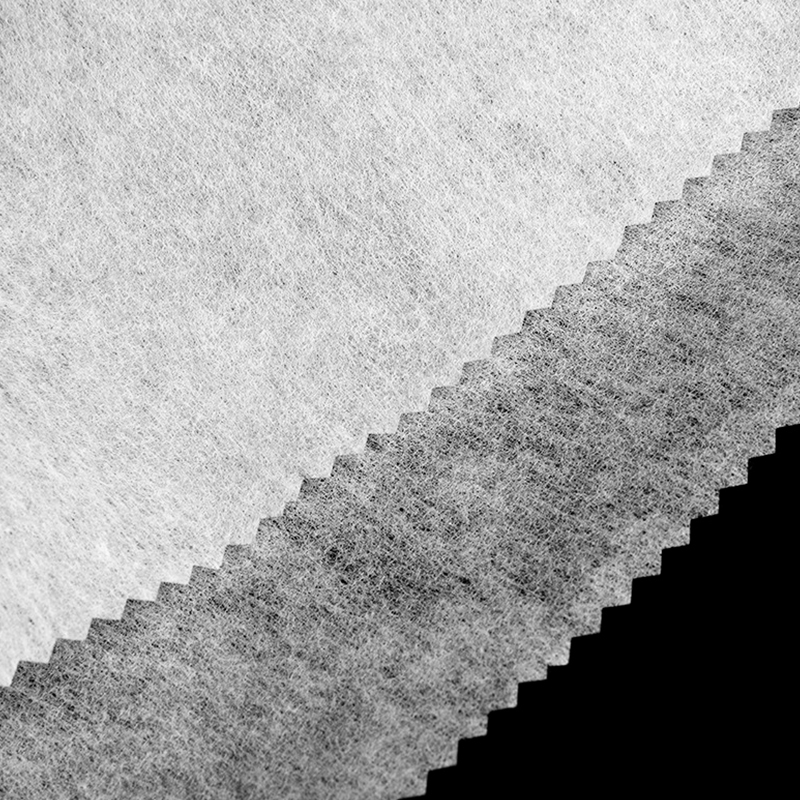
When elastic is threaded through a simple fabric casing made from a single layer of lightweight fabric, the repeated stretching and relaxing of the elastic causes the fabric to distort over time. The outer fabric bunches between the rows of topstitching, or the waistband begins to roll forward or backward after washing. Adding a layer of interlining — a soft, woven, non-fusible inner layer — cushions the elastic, stabilizes the casing, and prevents the outer fabric from wrinkling and puckering around the elastic.
Interlining used this way is different from fusible interfacing. Fusible interfacing bonds directly to the fabric with heat, stiffening it. Interlining is a separate, loose layer that moves slightly with the elastic, absorbing the mechanical stress without rigidly constraining the fabric. Common interlining materials for this purpose include soft cotton muslin, polyester batting cut thin, or purpose-made woven interlining from a fabric shop. The weight should be comparable to or lighter than your outer fabric.
How to Cut and Apply Interlining at the Waist
Cut a strip of interlining the same length as your waistband casing and about half the finished folded width — so if your casing folds down to 2 inches (5 cm) finished, cut your interlining strip 2 inches wide. This positions the interlining inside the fold of the casing, surrounding the elastic on the inner face.
- With the skirt body assembled and gathered (if applicable), fold the top raw edge down by the full casing depth — typically 1 inch (2.5 cm) for the seam allowance fold plus twice the elastic width plus 0.5 inch (1.3 cm) ease.
- Before stitching the casing closed, lay the interlining strip inside the fold, flat against the inner face of the outer fabric. It should sit within the tunnel that the elastic will pass through.
- Pin the casing in place, catching the interlining inside without letting it shift.
- Stitch the casing closed along the folded bottom edge, leaving a 2-inch (5 cm) gap for threading the elastic. The interlining is now enclosed in the casing.
This technique is especially valuable when working with sheer or very lightweight fabrics like chiffon, georgette, or voile, where the elastic would otherwise be visible or cause unsightly puckering. With interlining inside the casing, the waistband looks smooth, flat, and intentional.
When to Skip Interlining
Interlining is not always necessary. If you are using a medium to heavyweight outer fabric — such as denim, canvas, or thick wool — the fabric itself has enough body to support the elastic without additional stabilization. Adding interlining to an already-heavy casing creates bulk and makes the waistband stiff and uncomfortable. In those cases, the fabric does the work of interlining on its own. Reserve the interlining technique for lightweight, drapey, or sheer fabrics where the outer fabric needs structural support.
Creating and Sewing the Waistband Casing
The waistband casing is the tunnel through which the elastic passes. There are two common approaches: folding the top of the skirt over to form the casing, or sewing a separate waistband piece and attaching it to the skirt top.
Fold-Down Casing (Simplest Method)
This is the most common method for beginners and works well for lightweight and medium-weight fabrics.
- Finish the top raw edge of the skirt with a zigzag stitch or serger to prevent fraying.
- Fold the top edge to the wrong side by the required casing depth — for 1-inch elastic, fold down approximately 2.5 inches (6.4 cm): 1 inch for the elastic, 0.5 inch for ease, and 1 inch for a clean fold at the top. Press the fold firmly with an iron.
- Pin the folded edge in place around the entire waist.
- Stitch close to the bottom folded edge, leaving a 2-inch (5 cm) gap at a side seam for threading the elastic. Stitch length should be 2.5–3.0 mm for woven fabrics.
- Optionally, stitch a second line close to the top folded edge of the casing for a cleaner finish and to prevent the casing from flipping out when wearing.
Separate Waistband Strip (More Polished Result)
For a cleaner look, particularly on skirts with gathering, cut a separate waistband strip. This strip should be as long as your hip measurement plus 1 inch (2.5 cm) for seam overlap, and wide enough to enclose the elastic on both sides with seam allowance — for 1-inch elastic, cut the strip 3.5 inches (9 cm) wide.
- Fold the strip in half lengthwise, wrong sides together, and press.
- With right sides together, pin the raw edges of the waistband strip to the top raw edge of the skirt body, matching any gathering evenly. Sew with a 5/8-inch (1.5 cm) seam allowance.
- Press the seam toward the waistband. Fold the waistband up and over to the inside of the skirt, enclosing the seam allowance, and press again.
- Stitch in the ditch (sewing directly in the seam line from the right side) or topstitch along the bottom folded edge of the waistband from the inside, leaving a gap for threading the elastic.
If you are using interlining, insert it into the waistband tunnel at this stage before closing the gap, as described in the previous section.
Threading and Securing the Elastic
Threading elastic through the casing is straightforward, but small details prevent common frustrations like twisted elastic or elastic that pulls free before you can secure it.
- Attach a large safety pin or bodkin to one end of the elastic. Pin the opposite end of the elastic to the outside of the skirt at the gap opening — this prevents the elastic from disappearing inside the casing as you thread it through.
- Feed the safety pin end through the casing opening and work it all the way around the waist. Take your time — go slowly to avoid twisting the elastic inside the tunnel. A twisted elastic cannot be corrected without removing it and starting again.
- When both ends emerge from the gap, overlap them by about 1 inch (2.5 cm) and check that the elastic lies flat and untwisted. Try the skirt on or check against your waist measurement.
- Join the elastic ends securely. Sew a box stitch (a rectangle with an X inside) through both layers using a short stitch length (1.5–2.0 mm). This creates a strong, flat join that will not come apart under the stress of repeated wearing and washing.
- Distribute the fabric evenly around the joined elastic so no section bunches more than another. Close the gap in the casing by stitching it shut.
For a skirt where the elastic needs to stay in a fixed position rather than rotating freely inside the casing — useful for preventing waistband roll — stitch through the waistband and elastic at the side seams and center front and back. Use a short zigzag stitch so the elastic can still stretch without snapping the thread.
Hemming the Skirt
The hem is the last major step and one that significantly affects how the finished skirt looks. Press the skirt thoroughly before hemming, then try it on (or put it on a dress form) to check the hem level, since gathered fabric can shift slightly when worn.
Double-Fold Hem (Most Common)
Fold the raw bottom edge up by 0.5 inch (1.3 cm) to the wrong side and press. Fold again by another 0.5 inch (1.3 cm) or 1 inch (2.5 cm) depending on how deep you want the hem. Press again and pin in place. Stitch close to the top folded edge of the hem. For woven fabrics, a stitch length of 2.5–3.0 mm works well. Press the hem flat after stitching.
Narrow Rolled Hem
A narrow rolled hem (about 0.25 inch / 6 mm) works beautifully on lightweight fabrics like chiffon, rayon, and cotton lawn. Use a rolled hem presser foot for best results. The narrow hem allows the skirt to float and drape without a heavy bottom edge pulling the fabric down.
Blind Hem
For a more refined finish on medium-weight fabric, a blind hem is nearly invisible from the outside. Most sewing machines have a blind hem stitch setting. When done correctly, only tiny, almost invisible stitches show on the right side of the fabric. This is the finish used on most ready-to-wear garments.
Common Mistakes and How to Fix Them
Even experienced sewers run into problems with elastic waist skirts. Knowing what can go wrong — and how to fix it — saves time and prevents wasted fabric.
| Problem | Likely Cause | Solution |
|---|---|---|
| Waistband rolls forward | Casing too wide, elastic too narrow, or no interlining | Add a second row of topstitching through the waistband and elastic; add interlining next time |
| Elastic twists inside casing | Casing too wide, or elastic twisted during threading | Remove elastic, re-thread carefully; stitch through casing and elastic at seam points to hold it flat |
| Gathering uneven | Gathers not evenly distributed before stitching | Divide waist and skirt into quarters and match quarter marks when gathering |
| Skirt is too short after washing | Fabric not pre-washed | Let out the hem if there is enough seam allowance; always pre-wash fabric before cutting in future |
| Waistband fabric puckers around elastic | Lightweight fabric with no stabilization | Use interlining inside the casing; use wider elastic to distribute pressure |
Lining an Elastic Waist Skirt
Lining a skirt adds comfort, opacity, and a more polished interior finish. For an elastic waist skirt, there are two main approaches to incorporating a lining.
Cut the lining to the same dimensions as the outer skirt panels, but shorten it by about 1 inch (2.5 cm) so it does not show beneath the hem. Sew the lining side seams, then place the outer skirt and lining wrong sides together. Treat the two layers as one when attaching the waistband casing. This is the simplest lining method and requires almost no additional steps beyond cutting the lining pieces. The interlining, if used, sits between the lining and the outer fabric inside the waistband casing, sandwiched between the three layers.
Floating Lining
A floating lining is attached only at the waist seam and hangs free inside the skirt. This is better for full skirts where you do not want the lining to add bulk at the hem, or for fabrics that behave differently when layered. Sew the lining separately, then with wrong sides together, baste the lining to the outer skirt at the waist edge before constructing the waistband casing. The lining hem can be finished separately — either hemmed at the same length as the outer fabric or slightly shorter.
Finishing Touches That Elevate the Final Result
The difference between a skirt that looks handmade and one that looks professionally sewn often comes down to the finishing details. None of these steps are difficult, but each one adds a visible layer of quality.
- Press every seam before moving on. Pressing sets the stitches into the fabric and flattens the seam allowances, making subsequent steps easier and giving the finished garment a cleaner silhouette.
- Topstitch the waistband from the right side. A row of topstitching at the top and bottom edges of the waistband holds everything flat and adds a purposeful, structured look. Use matching thread or a complementary color as a design detail.
- Trim and grade seam allowances at any point where bulk is an issue — particularly at the waistband seam if you are using a separate waistband piece. Grading means trimming each layer of seam allowance to a different width so they step down in thickness.
- Clip curves on A-line side seams if the seam curves outward toward the hem. Clipping allows the seam allowance to spread and lie flat when pressed open.
- Give the finished skirt a final press using a pressing cloth on delicate fabrics. Steam setting is particularly effective for removing any remaining wrinkles from gathered sections.
- Hang the skirt for 24 hours before hemming if you are working with a bias-cut or very drapey fabric. Bias-cut fabric stretches and drops over time, and hemming too soon results in an uneven hem after the fabric settles.
Fabric and Interlining Combinations Worth Knowing
Choosing the right interlining type for your outer fabric prevents common compatibility issues. The following combinations reflect both professional practice and practical home sewing experience.
| Outer Fabric | Recommended Interlining | Notes |
|---|---|---|
| Chiffon / Georgette | Soft cotton muslin or thin polyester non-woven interlining | Prevents elastic from showing through; reduces puckering |
| Cotton lawn / Voile | Cotton batiste or lightweight woven interlining | Adds opacity and body without stiffness |
| Rayon challis | Thin silk organza or cotton muslin interlining | Rayon is slippery and benefits from the grip of an interlining layer |
| Quilting cotton | Generally not needed; fabric has sufficient body | Use fusible interfacing instead if waistband needs extra stability |
| Linen | Lightweight cotton interlining if linen is loosely woven | Dense linen does not need interlining; open-weave linen benefits from it |
| Denim / Canvas | No interlining needed | Heavy fabric creates excessive bulk with interlining; use wider elastic instead |
How Long Does It Take to Make an Elastic Waist Skirt?
Time estimates depend heavily on the style, fabric, and your experience level. Here is a realistic breakdown for three common skirt types, assuming you have your materials ready and your machine threaded.
- Simple rectangle gathered skirt (beginner): 1.5 to 2.5 hours including cutting, sewing side seams, creating the waistband casing, threading elastic, and hemming.
- A-line skirt with separate waistband (intermediate): 3 to 4 hours, with extra time for shaping the panels, attaching the waistband strip, and fitting adjustments.
- Lined tiered maxi skirt with interlining at waist (intermediate-advanced): 5 to 7 hours, including cutting multiple tiers, gathering each tier, adding a lining, incorporating interlining in the waistband, and a careful hem on a long skirt.
First-timers should budget extra time for pressing, ripping out mistakes, and re-reading instructions. Once you have made one gathered skirt successfully, the second takes roughly half the time.


