How to Make a Reversible Tote Bag: The Complete Step-by-Step Guide
Making a reversible tote bag is one of the most satisfying sewing projects you can take on — and the result is a bag that literally gives you two looks in one. The core process involves cutting two sets of fabric panels (outer and inner), sewing each into a bag shell, inserting one shell inside the other, and finishing the top edge so both sides are wearable. The secret to a bag that holds its shape and handles everyday use without looking flimsy? Using the right interlining. Whether you're a complete beginner or an experienced sewist looking to refine your technique, this guide walks through every step — from fabric selection to the final stitch — with enough detail that you won't need to guess at anything.
Reversible tote bags have surged in popularity for good reason. A single bag sewn in an afternoon can replace two or three single-fabric bags and makes a thoughtful handmade gift. With the right interlining and construction method, yours will last for years rather than wearing out after a season.
What You Need Before You Start
Gathering everything before you cut a single piece of fabric saves you from interruptions mid-project. Below is a complete list of supplies for a standard tote measuring approximately 14 inches wide × 15 inches tall with 4-inch handles.
Fabric
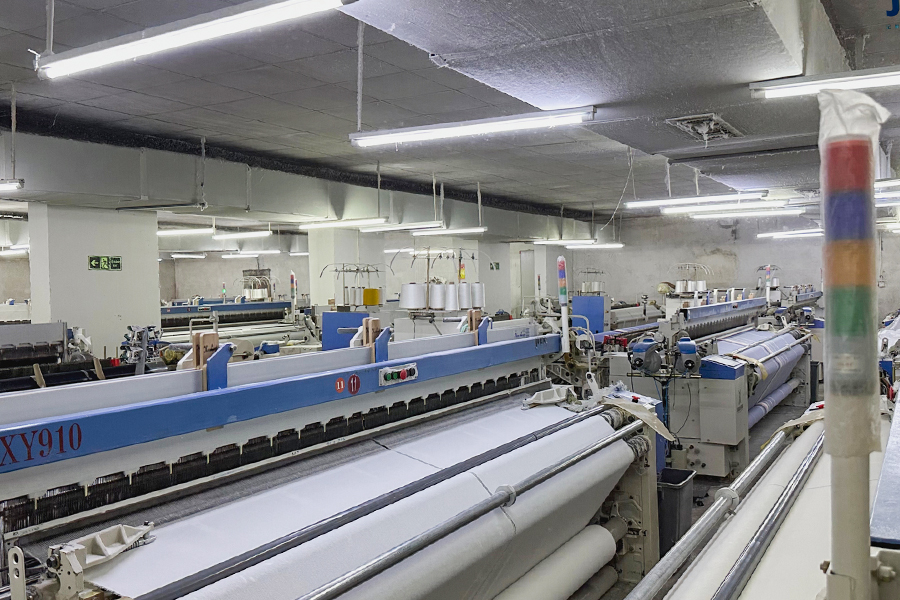
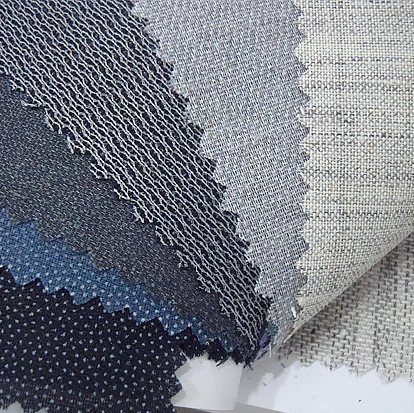
- ½ yard outer fabric (canvas, denim, cotton twill, or linen work well)
- ½ yard inner/lining fabric (quilting cotton is ideal for its easy handling)
- Optional: ¼ yard accent fabric for contrasting handles
Interlining & Interfacing
- ½ yard woven fusible interlining (medium-weight, 20–40 gsm)
- OR non-woven sew-in interlining if you prefer no heat bonding
- Extra interlining cut into strips for the handles (critical for handle strength)
Tools
- Sewing machine with a standard presser foot
- Iron and ironing board (essential for fusing interlining)
- Rotary cutter or fabric scissors
- Ruler, cutting mat, pins or fabric clips
- Thread in colors matching both fabrics
- Seam ripper (every sewist's best friend)
Optional Additions
- Magnetic snap closure (12–18 mm)
- Interior zipper pocket
- D-ring or key clip
- Bag feet (4 brass feet for the base)
Why Interlining Makes or Breaks a Reversible Tote Bag
Most beginner tutorials gloss over this, but the choice of interlining is the single biggest factor in how professional your finished tote looks and how long it lasts. Interlining sits between the outer fabric and the lining (or is fused directly to one layer), adding body, structure, and weight stability that raw fabric alone cannot provide.
For a reversible bag, interlining presents a unique challenge: you need structure without bulk, because the bag is designed to be flipped inside out. Too much interlining and the bag becomes stiff and difficult to reverse. Too little and it will sag and lose its shape after a few uses. The sweet spot for most reversible totes is a medium-weight woven fusible interlining in the 20–35 gsm range, applied to the outer fabric only (not the lining), which gives structure while keeping the bag flexible enough to flip cleanly.
Types of Interlining and When to Use Each
| Interlining Type |
Weight |
Best For |
Reversible Bag? |
| Woven fusible interlining |
Light–Medium |
Cotton canvas, quilting cotton |
Excellent |
| Non-woven sew-in interlining |
Light |
Delicate fabrics, heat-sensitive materials |
Good |
| Foam interlining / Batting |
Heavy |
Structured totes, laptop bags |
Poor (too stiff) |
| Woven sew-in interlining |
Medium |
Natural fibers, tailored look |
Very Good |
| Knit fusible interlining |
Light |
Stretch fabrics, jersey |
Fair |
Interlining comparison for reversible tote bag construction
How to Apply Fusible Interlining Correctly
Incorrect application is one of the most common causes of bubbling, peeling, and uneven stiffness in home-sewn bags. Follow this process precisely:
- Cut interlining pieces to match your fabric panels exactly — do not trim after fusing, as raw edges fray.
- Place the interlining glue-side-down on the wrong side of the outer fabric. The glue side typically feels slightly rough or has a visible dotted pattern.
- Set your iron to the temperature recommended on the interlining packaging. For most woven fusible interlining, this is medium-high heat (wool or cotton setting) with steam off.
- Press — do not slide — the iron in 10-second intervals, moving section by section across the full panel. Sliding the iron can shift the interlining before it has bonded.
- Allow the fabric to cool completely on a flat surface before moving it. Lifting warm interlining-fused fabric can cause it to stretch or pucker.
- If any corners or edges lift, re-press with a damp pressing cloth, which reactivates the adhesive without scorching.
Apply interlining to the outer fabric panels and handle strips only. Applying interlining to the lining as well doubles the bulk at seams and makes the finished bag difficult to reverse smoothly. The lining's own fabric weight is sufficient for its purpose.
Cutting Your Fabric Panels: Measurements and Layout
Accurate cutting is non-negotiable. Even a quarter-inch difference in panel size can cause misaligned seams or an uneven top edge on the finished bag. All measurements below include a ½-inch seam allowance throughout.
Main Panels (cut 4 total)
15" × 16"
2 outer fabric + 2 lining fabric
Interlining Panels (cut 2)
15" × 16"
Fused to outer panels only
Handle Strips (cut 4)
4" × 24"
2 outer + 2 lining (or all outer)
Handle Interlining (cut 2)
1" × 24"
Centered strip for handle strength
Cutting Tips for Clean Edges
- Pre-wash and press all fabrics before cutting to account for shrinkage. Cotton fabrics can shrink 3–5% in the first wash.
- Use a rotary cutter against a clear quilting ruler rather than scissors for panels — this gives a perfectly straight edge every time.
- Cut outer fabric and interlining simultaneously by stacking them with the glue side of the interlining facing up, away from the cutting mat, so the pieces are already aligned when you fuse them.
- Mark the right side of each piece with a chalk mark immediately after cutting to avoid confusion when sewing — especially important since outer and lining panels are the same size.
Sewing the Handles: The Right Way to Use Interlining for Strength
Handles are the most-stressed part of any tote bag. A bag carrying a laptop, groceries, or textbooks can easily hold 10–15 lbs, and all of that weight transfers through two strips of fabric. Handles that are not reinforced with interlining — or that are attached with only a single row of stitching — will stretch, twist, and eventually fail at the attachment point.
Step-by-Step Handle Construction
- Fuse your 1-inch wide interlining strip to the center of the wrong side of each handle fabric strip. This reinforces the core of the handle without creating bulk at the folded edges.
- Fold both long edges of the handle strip toward the center (wrong sides together), meeting at the midline over the interlining strip. Press firmly.
- Fold the entire handle in half lengthwise (the folded edges are now inside), enclosing the interlining completely. Press again.
- Edgestitch both long sides of the handle, approximately ⅛ inch from the edge. Add a second row of stitching ¼ inch from the edge for additional strength.
- Repeat for all four handle strips. If you are making a truly reversible handle (usable from both sides), pair one outer-fabric handle strip with one lining-fabric handle strip, sewing them wrong-sides-together before folding.
Handle Placement
Place handles 4 inches from each side seam, centered on the top edge of the front and back outer panels. Pin or clip them in place with raw edges aligned with the top raw edge of the fabric panel. Baste them in place using a ¼-inch seam — this holds them securely during assembly without the final seam allowance catching them in the wrong direction.
For a reversible bag, consider whether you want the handles to be fixed (same position on both sides) or reversible (each side has a visible set of handles). Fixed handles require attaching all handles to the outer shell only. Reversible handles require attaching one set to the outer shell and a second set to the lining shell, positioned identically.
Assembling the Outer and Lining Shells
With interlining applied and handles ready, you now sew two complete bag "shells" — one from the outer fabric and one from the lining. They are constructed identically, with one important difference: the lining shell has a gap left open in the bottom seam that you'll use to turn the bag right-side out.
Sewing the Outer Shell
- Place the two outer fabric panels right sides together. Align all edges carefully — this is where pre-pressing your interlining pays off, because the panels should lie perfectly flat without any puckering.
- Sew both side seams and the bottom seam using a ½-inch seam allowance. Backstitch at the start and end of each seam.
- Press the seams open with your iron. Open seams reduce bulk significantly, which matters for a reversible bag that will be folded back on itself during use.
- To create the boxed bottom (which gives the bag a flat base and more interior volume), fold each bottom corner so the side seam aligns with the bottom seam, forming a triangle. Measure 2 inches from the point of the triangle and draw a line perpendicular to the seams. Sew along this line, then trim the corner leaving ½ inch seam allowance. This step gives the bag a 4-inch wide flat base.
- Turn the outer shell right-side out and press the top edge crispy flat.
Sewing the Lining Shell
- Repeat the same process with the lining panels, but leave a 4–5 inch gap in the center of the bottom seam unsewn. Mark this gap clearly with pins before you start so you don't accidentally sew it closed.
- Sew both side seams and the bottom seam (except the marked gap), backstitch at the endpoints next to the gap.
- Press seams open and box the corners exactly as you did for the outer shell.
- Keep the lining shell wrong-side out (do not turn it).
Adding an Interior Pocket (Optional but Highly Recommended)
Before assembling the two shells together, now is the time to add interior features. A simple slip pocket requires one rectangle of fabric, typically 9 inches wide × 10 inches tall, folded in half to 9 × 5 inches, sewn on three sides, turned right-side out, and topstitched to one lining panel with the fold at the top. Dividing the pocket with a vertical seam down the center creates two separate compartments for a phone and cards without any additional fabric.
Joining the Outer and Lining Shells Together
This is the step that actually creates the reversible structure — and the part where most first-timers encounter confusion. Take your time here and the rest will be straightforward.
1
Drop the outer shell (right-side out) down into the lining shell (wrong-side out). The right sides of both fabrics should now be facing each other, with the outer shell sitting inside the lining. Align the top raw edges and the side seams precisely.
2
Ensure the handles are tucked down between the two shells — they should not poke out at the top. Pin the top edge all the way around, matching side seams and handle positions.
3
Sew all the way around the top opening using a ½-inch seam allowance. Go slowly over the handles — you're sewing through several layers of fabric plus interlining at those points. Use a heavy-duty needle (size 90/14 or 100/16 for canvas).
4
Reach through the gap in the lining bottom and pull the entire bag through to the right side. It helps to pull the outer shell out first, then coax the lining to follow. Take your time — pulling too fast can pop a seam.
5
Push the lining down into the outer shell (or vice versa, depending on which side you want to show first). Press the top edge so both layers lie smooth and flat. The handles should now emerge cleanly from the top seam.
6
Close the gap in the lining bottom by folding the seam allowances in and either hand-stitching the opening closed with a ladder stitch, or machine-stitching very close to the folded edge. Machine-stitching is faster and equally strong.
7
Topstitch around the entire top opening, ¼ inch from the edge. This step is what gives the bag a professional, finished appearance and keeps the lining from creeping up out of the bag opening during use.
Choosing Fabrics That Work Well Together in a Reversible Design
Not all fabric combinations work equally well in a reversible tote. Beyond aesthetic preferences, there are practical considerations that affect how cleanly the bag reverses, how it handles weight, and how it wears over time.
Weight Matching Is Critical
The outer fabric and lining should be within one weight category of each other. Pairing a heavy 12 oz canvas outer with a lightweight cotton voile lining will cause the bag to pull and distort when reversed, because the two layers have very different drape. Ideal pairings include:
- Medium cotton canvas (8–10 oz) + quilting cotton — the most popular pairing, easy to sew and very durable
- Linen-cotton blend + cotton poplin — gives a refined, natural look with good structure after interlining
- Denim (light to medium weight, 6–8 oz) + cotton twill — sturdy combination that handles heavier loads
- Laminated cotton + regular cotton — water-resistant outer with easy-care lining, the interlining here should be a light sew-in type to avoid adhesion issues with the laminate coating
Pattern Scale and Direction
When both fabrics are patterned, aim for one large-scale print and one small-scale print or solid. Two competing large prints fight each other visually, and cutting them to avoid awkward pattern placement at seams becomes unexpectedly complicated. Stripes require careful attention to grain line so they run parallel to the side seams rather than at an angle. Pre-washing patterned fabric before cutting is essential — some prints bleed (especially deep reds and navys) and can transfer to the contrasting fabric if they come in contact while wet during the bag's first wash.
Common Mistakes and How to Fix Them
Even experienced sewists run into problems with reversible bags the first time. Here are the issues that come up most often, with practical solutions for each.
The Top Edge Is Puckered or Uneven
Usually caused by the outer shell and lining shell being slightly different sizes, or the seam allowance varying around the top opening. Prevention: cut both sets of panels from the same template and check that the top raw edges are aligned exactly before you sew them together. Fix: carefully unpick the top seam, align the edges again, trim any excess, and re-sew.
Interlining Is Peeling or Bubbling
This happens when the iron temperature was too low, the pressing time was too short, or the interlining was moved while still warm. Re-fuse by pressing with a damp pressing cloth at a slightly higher temperature in 10-second intervals. If the interlining continues to peel, it may not be compatible with your fabric (some synthetic coatings repel the adhesive). Switch to a sew-in interlining for synthetic fabrics.
The Bag Won't Reverse Cleanly
Too much interlining is the most common cause. If you applied interlining to both the outer and lining panels, the combined bulk at seams makes the bag rigid. For future bags, apply interlining to the outer fabric only. For the current bag, trim the seam allowances carefully to ¼ inch after sewing (grade the seams) and clip the corners to reduce bulk.
Handles Pull Away from the Bag
Handles attached with only a single row of topstitching will eventually work loose under load. Reinforce with a box stitch — a square stitch with an X through the center — at each attachment point. The box stitch distributes force across a larger area, which is why it's the standard reinforcement method for backpack straps and bag handles in commercial production.
The Lining Keeps Poking Out the Top
This is a fit problem: the lining is slightly larger than the outer bag. When making the lining, reduce the side and bottom seams by a scant ⅛ inch (sewing at a ⅝-inch seam allowance rather than ½ inch), which makes the lining shell very slightly smaller. It will then sit snugly inside the outer shell rather than trying to escape through the opening. A topstitch around the top edge also anchors the lining in place.
Skipped Corners Are Bulky or Rounded
Corners that aren't clipped or boxed correctly create a lumpy, rounded appearance at the bottom of the bag. On the box corners, trim the triangle of fabric close to the sewn line (within ¼ inch). At the top edge corners where the handles attach, clip diagonally across the corner seam allowance, taking care not to cut into the stitching. This allows the seam allowance to spread out when turned, creating a sharp rather than rounded corner.
Finishing Touches That Elevate the Final Result
The difference between a bag that looks handmade and one that looks handcrafted comes down to a handful of finishing steps that most tutorials skip.
01
Press Every Seam, Every Time
Pressing after each seam — not just at the beginning and end of the project — is what creates that crisp, professional look. For a bag with interlining, use a medium-hot dry iron and press from the right side using a pressing cloth to avoid any shine from the iron on the outer fabric.
02
Understitch the Top Seam
After joining the outer and lining shells and before turning the bag, understitch the seam allowance to the lining by sewing ⅛ inch from the seam on the lining side. This pulls the seam allowance toward the inside and prevents the lining from rolling to the outside once the bag is in use. It's a small step that makes a big visible difference.
03
Add a Fabric Label
A small woven or printed label sewn into a side seam adds a personal or brand touch. For gift bags, a handwritten tag attached to the handle with a snap or simple loop is a charming finishing detail that costs almost nothing.
04
Magnetic Snap Installation (Before Assembly)
If adding a magnetic snap, it must be installed before the two shells are joined. Mark the snap position centered on the front panel, approximately 1 inch below the top raw edge. Back the installation point with a small square of firm interlining (2 × 2 inches) to prevent the snap washer from tearing through the fabric over time. Follow the snap manufacturer's instructions for installing the prongs through the interlining-backed fabric.
Caring for Your Reversible Tote Bag
Proper care keeps the bag looking its best and protects the interlining from deteriorating. Most cotton tote bags can be machine washed, but a few guidelines apply specifically to bags with interlining and multiple fabric layers.
- Wash in cold water on a gentle cycle. Hot water can reactivate some fusible interlining adhesives and cause them to shift or bubble.
- Turn the bag inside out before washing to protect the outer fabric surface.
- Air dry rather than machine drying. The tumbling action of a dryer puts stress on handle attachment points and can cause interlining to delaminate at the edges over repeated cycles.
- If the bag develops light wrinkles, press with a cool iron from the lining side. Avoid pressing directly on the outer fabric if it has a coated or textured surface.
- For spot-cleaning, a damp cloth and mild dish soap removes most everyday marks without requiring a full wash.
 English
 Español
 Türk
Türk